
How to Access:
1. Open a web browser (chrome, firefox, etc.), and navigate to p1.nolop.org
2. Login with username: nolop
3. Login with password: 3dprint
How to Upload Files:
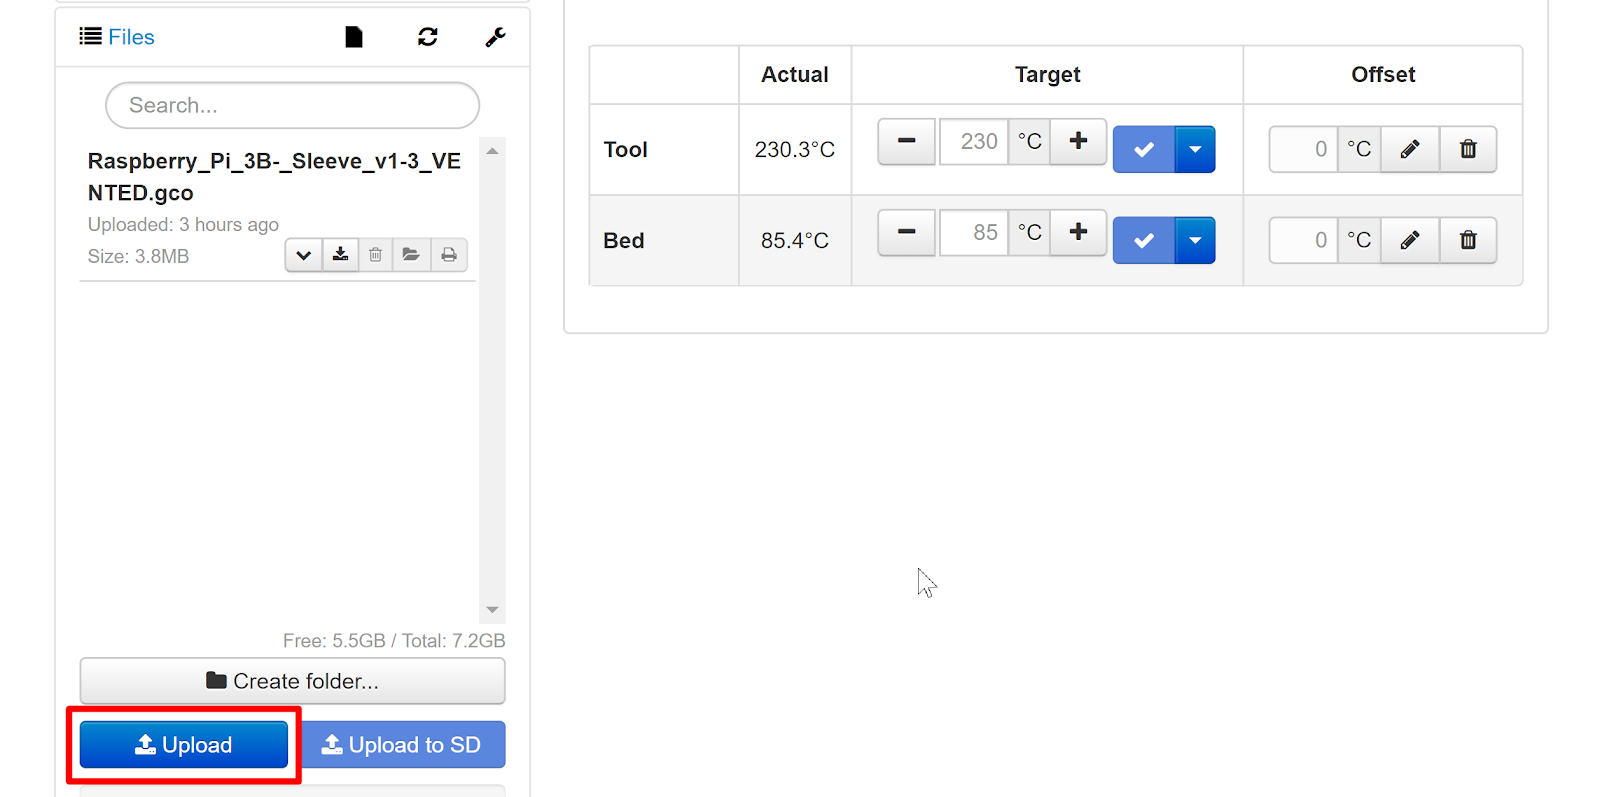
Under the “Files” tab (bottom left), click “Upload”.
The printer only accepts STL files. Most CAD software, like Solidworks or Rhino, can generate STL files from a model for you. If you need more details about STL files, 3D Systems has you covered.
Note: We wipe all the uploaded files periodically. Make sure you save a copy of your STL file somewhere else.
How to arrange your models:
1. Navigate to the “Slicer” tab along the top. Select your uploaded file and click the small “slice” button underneath it. It should then appear on the platform where you can drag it around.
2. From here, you can use the 5 buttons in the upper left hand corner to rotate, scale, delete and make other modifications to the model(s).

How to slice your models:
Note: Only change settings boxed in red.
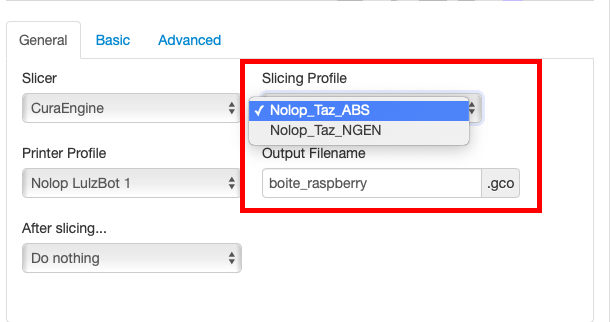
1. Navigate to the bottom of the screen and view the “General” tab of the slicer. Under “Slicing profile” choose the type of material you are going to print with.
Note: Ask a Nolop employee if you do not know what material is currently loaded or if you need to change materials.
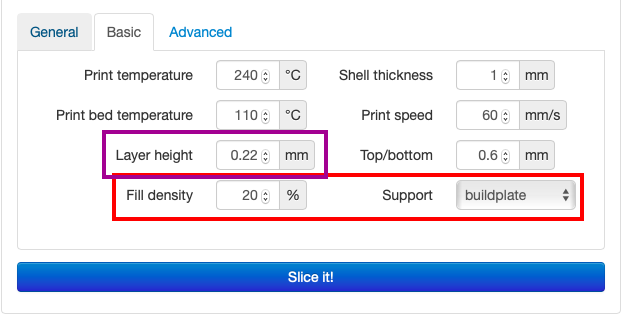
2. Navigate to the “Basic” tab and select your preferred “Infill density” and “Support” settings.
Note: You may adjust the layer height (in purple) if you have specific quality needs.
Otherwise, leave this setting alone!
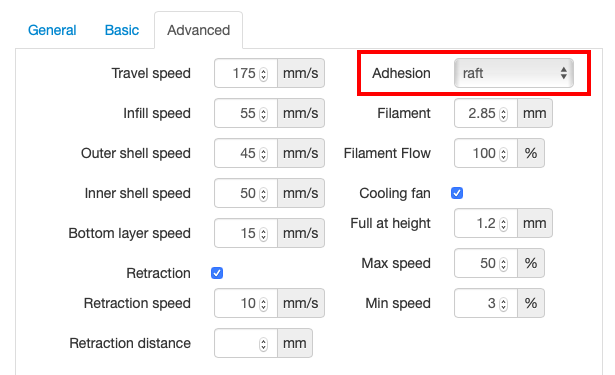
3. Navigate to the “Advanced” tab and choose your preferred method of bed adhesion.
Note: Nolop recommends at least using a “brim” or a “raft” for your prints. Use a raft for particularly tall or flimsy objects. Only use “none” if you are sure your print will stick.
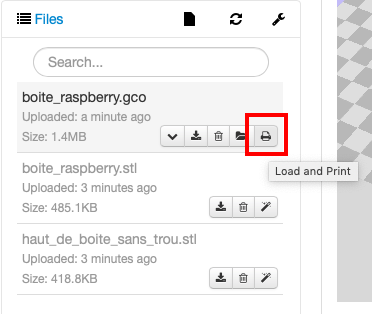
4. After you are satisfied with your settings, click the large blue button at the bottom of the page to slice your model. After it is sliced, it will appear in the “files” section on the left hand side of the page. Click the “load and print” button on your .gco file to begin printing your model.
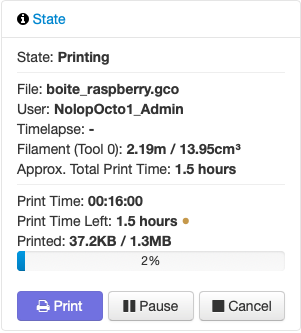
Monitoring your print:
Your print should now have begun. To monitor it, take a look at the “state” menu in the upper left hand corner of the page.
Note: Please avoid clicking or changing any settings in the “temperature” or “control” tabs of Nolop Web 3D Printing.
Tutorial Videos:
3D Printing or Lasercutting? Consider the following questions!
This video will walk you through a few questions you should ask yourself when deciding whether to laser cut or 3D print.
A summary of these questions:
Is your part predominantly flat and square? Or, can it be broken down into flat components?
Generally, the laser cutter is a nicer tool for fabrication, so if it is possible to laser cut, use that.
Is your part close to exceeding 8 inches in any direction?
The 3D printer has a bed of 9.8″ x 8.3″ x 8.3″, while the laser cutter is 12″ x 24″. However, the laser cutter can only cut flat stuff.
Do you need your part done as soon as possible?
Laser cutting is generally a faster rapid prototyping tool than 3D printing. Laser cut pieces usually take a few minutes, while 3D printing can take a few hours, so if you want parts done quickly, laser cutting may be a better option.
Are you looking for precise holes/edges?
3D printed holes/edges come out of the printer smaller than the given dimensions due to plastic expansion, while laser cut holes/edges come out very slightly larger, due to the size of the laser. Generally, the laser cutter is much more precise than the 3D printers.
Do you want words or shapes etched into your part’s sides?
3D printed parts can come out a bit messy due to the filament strands. The laser cutter is great for both cutting and etching and will cut much clearer words/shapes.
Check out some great examples of laser cut vs 3D printed parts!
3D Printing: Techniques for Speed
This video is all about efficiently orienting your 3D print on the printer bed. The goal is to lay your part such that the greatest amount of surface area is flush with the bed. Any overhangs on your part will have added support material, and support material will just end up in the trash!
Relevant links:
- The software to use
- The printer specs
- The printer’s quick-start guide
- The printer’s user manual